


Boxy Jeep
Electric Speedometer Conversion - 84-90 XJ/MJ
Electric Speedometer Conversion - 84-90 XJ/MJ
Couldn't load pickup availability
If you're looking to convert your bouncy mechanical speedometer on your 87-90 Jeep Cherokee XJ or Comanche MJ to an electronic 91+ model, this kit will allow you to properly install a 91-96 gauge into your 87-90 gauge cluster housing.
Includes necessary adapters, sandwich plates, wiring, loom, connectors, heat shrink, grommets, and terminals to connect from the gauge cluster with our plate kit to the sensor housing, as well as a wiring diagram for you to DIY.
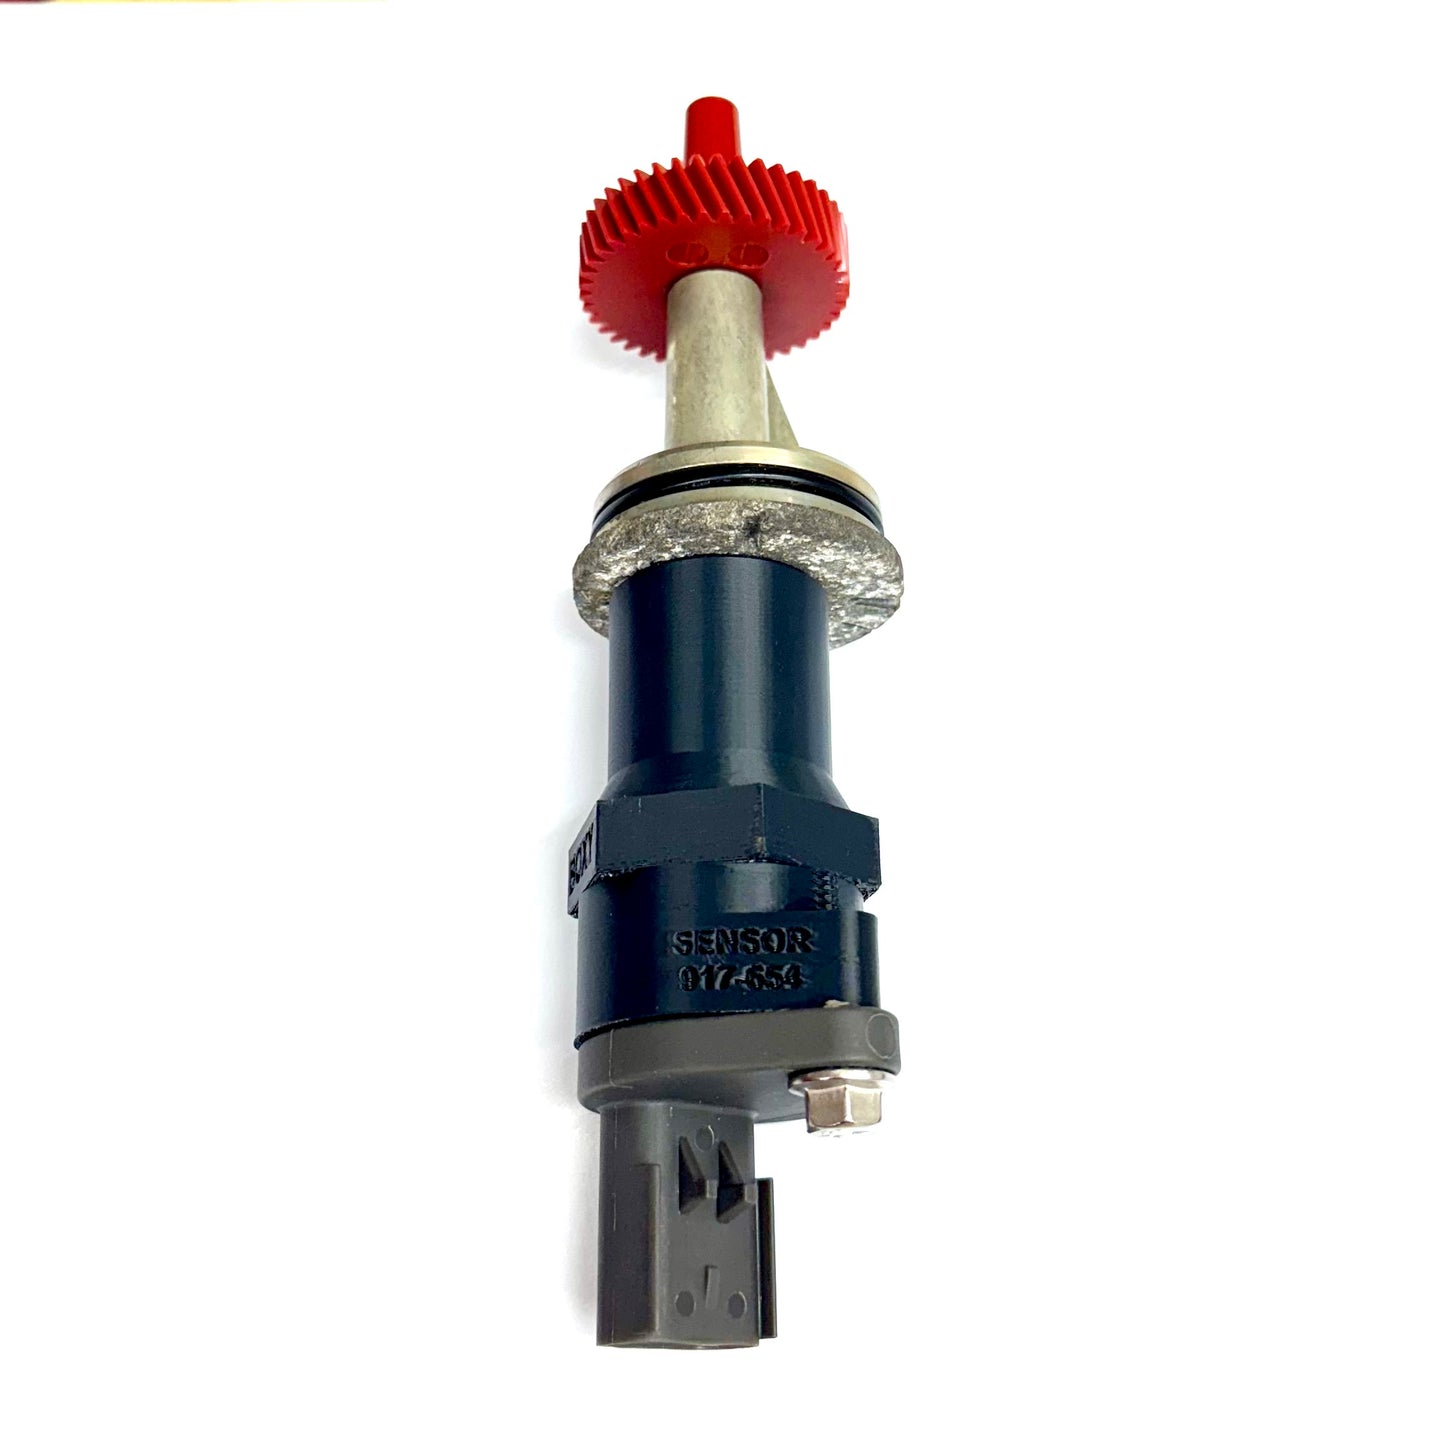
Does not include gauges/clusters or sensors. You will need to provide your own 87-90 mechanical cluster, a 91-96 electronic cluster, and the Dorman 917-654 speedometer sensor (or equivalent). However, this kit includes everything else, as well as wiring instructions.
Here is our blog post about the conversion--check it out before buying!
Share


I purchased the kit for my 1989 xj and everything went well. Instructions are great and the wiring harness makes install a super breeze. I even got a 120 mph spedometer of a european xj. Will soon try to install a cruise control system from rostra.
10/10 keep it up. I hope to purchase more awesome products in the future

This kit is awesome. I had been looking to replace my bouncy renix speedo for a a couple years and came across this great solution! Works perfectly. The only comments I have for improvement are:
1) On the instructions for the build it yourself wiring kit, the length specifications for the different sections could be clearer. It’s not too hard to figure out, but it would be easier if there were brackets indicating the length of wire to cut vs the desired end length with the connectors, as well as the ideal length between the 3 pin connector and the firewall bezel on the portion of the long wire that goes into the cabin.
2) I had to bevel the sensor adapter to fit the sensor. Perhaps that’s because I used on aftermet sensor (Dorman), but even with Vaseline on the O-ring, it would not slide into the adapter until I sanded the rim of the adapter.
3) I had to clearance the outside of the sensor adapter a bit with a razor blade, otherwise the vacuum connect below it on the transfer case would not plug in all the way.
4) The sensor adapter is printed to be able to be turned by a wrench, but do not use a wrench to tighten it, as it will break from even minor tightening. Just hand tighten. When I re-ordered the part, that instruction was given on the included piece of paper, but not when I received it as part of a kit. I’m guessing it’s there simply for removal.
5) In the instruction video it mentions being able to remove a C-clip to be able to roll back/forward the 91-96 speedo to match your original. That only works on renix speedos, not the newer ones, so it won’t work here. You would actually have to melt/break the plastic welds holding the odometer in place, as well as remove the speedo needle and risk breaking the stepper motor. You can manually roll the 1/10 counter back, but if the odometer is way off, this will take a very long time, so try to get something close. I used a drill with a bolt that I wrapped electrical tape around to spin it faster, but after 20 or so minutes, it had changed by about 2000 miles and the odometer started locking up so I stopped before causing any irreversible damage.
Amazing product overall. Hope this helps!
I purchased the kit for my 1989 xj and everything went well. Instructions are great and the wiring harness makes install a super breeze. I even got a 120 mph spedometer of a european xj. Will soon try to install a cruise control system from rostra.
10/10 keep it up. I hope to purchase more awesome products in the future
This kit is awesome. I had been looking to replace my bouncy renix speedo for a a couple years and came across this great solution! Works perfectly. The only comments I have for improvement are:
1) On the instructions for the build it yourself wiring kit, the length specifications for the different sections could be clearer. It’s not too hard to figure out, but it would be easier if there were brackets indicating the length of wire to cut vs the desired end length with the connectors, as well as the ideal length between the 3 pin connector and the firewall bezel on the portion of the long wire that goes into the cabin.
2) I had to bevel the sensor adapter to fit the sensor. Perhaps that’s because I used on aftermet sensor (Dorman), but even with Vaseline on the O-ring, it would not slide into the adapter until I sanded the rim of the adapter.
3) I had to clearance the outside of the sensor adapter a bit with a razor blade, otherwise the vacuum connect below it on the transfer case would not plug in all the way.
4) The sensor adapter is printed to be able to be turned by a wrench, but do not use a wrench to tighten it, as it will break from even minor tightening. Just hand tighten. When I re-ordered the part, that instruction was given on the included piece of paper, but not when I received it as part of a kit. I’m guessing it’s there simply for removal.
5) In the instruction video it mentions being able to remove a C-clip to be able to roll back/forward the 91-96 speedo to match your original. That only works on renix speedos, not the newer ones, so it won’t work here. You would actually have to melt/break the plastic welds holding the odometer in place, as well as remove the speedo needle and risk breaking the stepper motor. You can manually roll the 1/10 counter back, but if the odometer is way off, this will take a very long time, so try to get something close. I used a drill with a bolt that I wrapped electrical tape around to spin it faster, but after 20 or so minutes, it had changed by about 2000 miles and the odometer started locking up so I stopped before causing any irreversible damage.
Amazing product overall. Hope this helps!